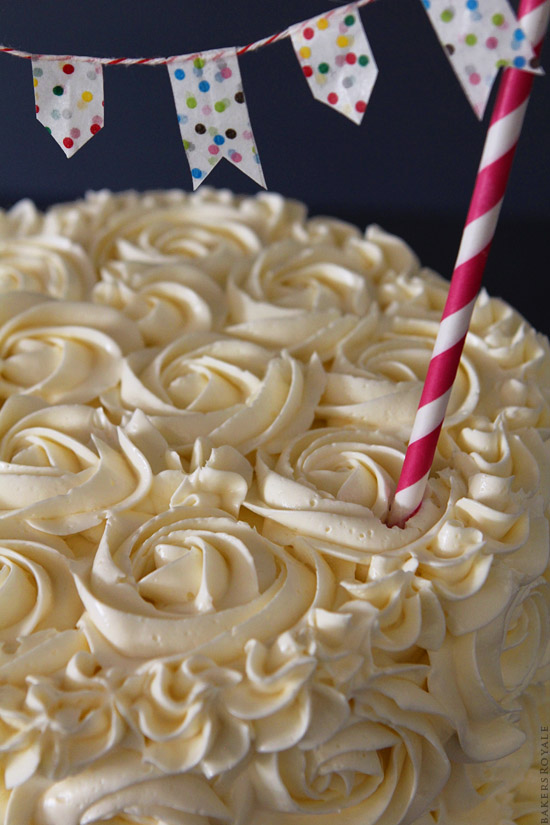
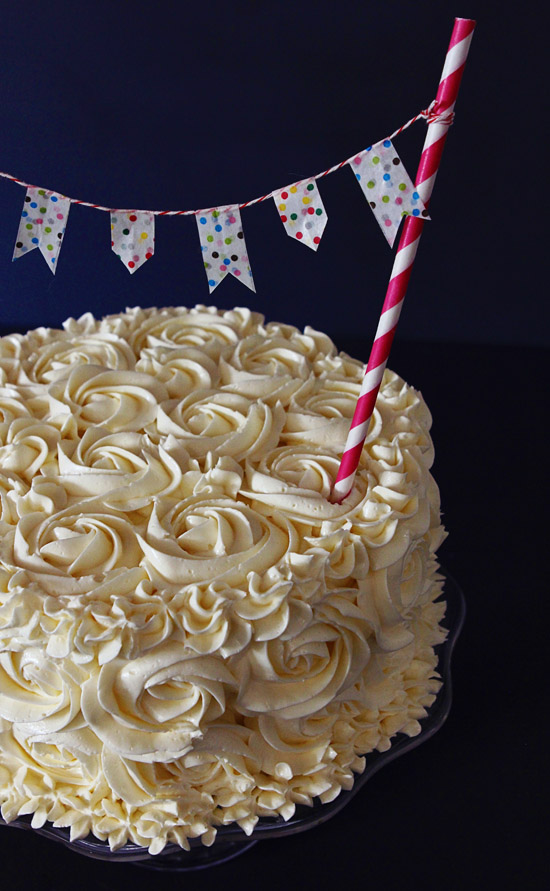
Practice makes perfect when it comes to making icing roses! Fill a pastry bag with a Wilton 1M tip and let’s begin. Step by step instructions included.
You may have seen this cake all around the internet, but it was originally piped by the very talented Amanda from i am baker. While mine may not look perfect like Amanda’s, I’m happy with the results. And happy to tell you, it’s not so difficult to do. If you wanna take on a smaller canvas for your first go; try Rose Cupcakes!
To help you along, I put together this tutorial on how to make a rose cake with step-by-step photos. My advice if you are even the least bit nervous about making this—take a deep breath, practice on a surface that will allow you to reuse the frosting and then go for it. Don’t hesitate, or the roses will end up looking jagged and stuttered from all the pausing.
A few notes:
- For the frosting I used my swiss meringue buttercream recipe (step-by-step photos included). If you decide to use another frosting, one that will slightly “crust” as it dries, use Amanda’s tip here, so that your roses will adhere to the cake.
- This is the chocolate cake recipe I used. I picked a denser cake, since I had intended on making this a two tier cake but ran out of time.
- Again, to make sure you are comfortable with the piping motion and with how much pressure to use on the pastry bag while piping the buttercream roses, practice on a surface that will allow you to reuse the frosting (straight –sided salad bowl worked great for me)
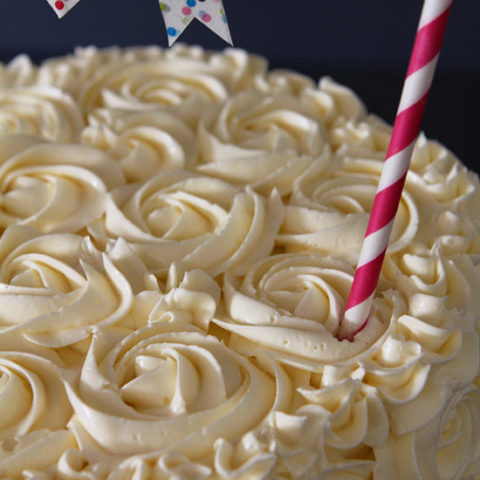
- Of course the bunting is extra, but I do love how it steps up the cute factor on a cake.
How to Make Roses on a Cake, Step by Step
Practice makes perfect, when it comes to making icing roses! Fill a pastry bag fitted with a Wilton 1M tip and let's begin. Step by step instructions included.
Ingredients
Frosting
- 7 large egg whites
- 2 1/4 cup sugar
- 6 sticks unsalted butter, diced and softened
- 1/4 teaspoon salt
- 2 tablespoon vanilla
Instructions
- Combine egg whites and sugar in a bowl placed over simmering water. Bring mixture to 160 degrees F while whisking constantly.
- Transfer mixture to stand mixer bowl fitted with a whisk attachment and beat on medium speed until mixture becomes foamy, then increase speed to high and beat until it cools and doubles in volume.
- Add butter in one piece at a time, mixing to incorporate after each addition. The mixture may appear clumpy and almost curdled looking-this is normal. Keep mixing and it will become even and smooth again. Add salt and vanilla and mix to combine.
**Refer to the post for step-by-step photos to piping the roses on the cake and making the bunting.**
To pipe roses on cake:
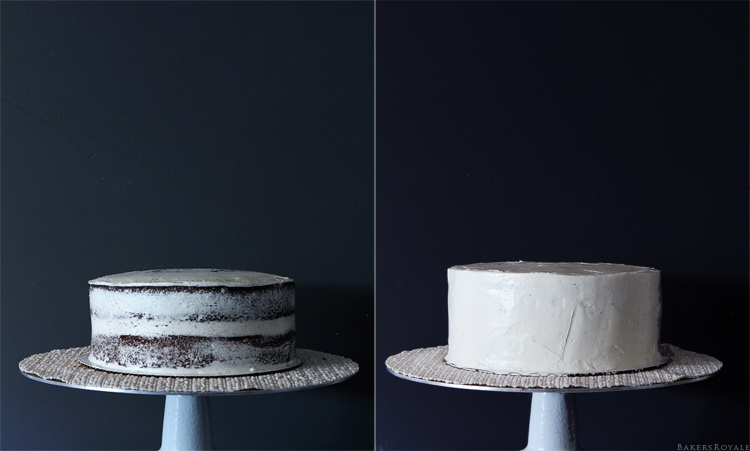
- Cover cake with a crumb coat.
- Cover cake with frosting coat.
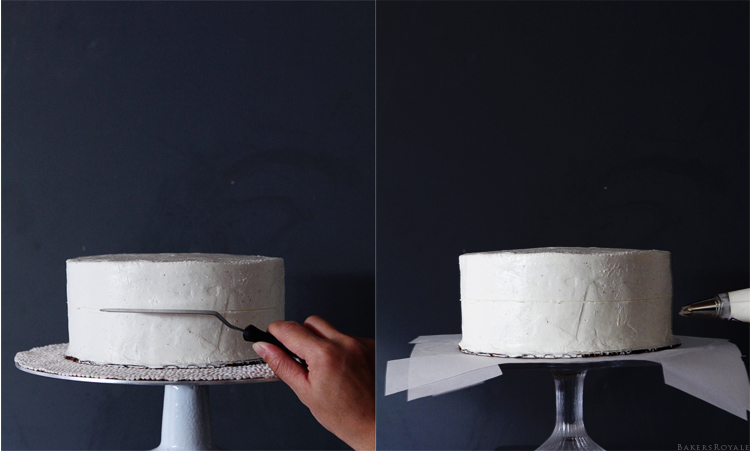
- Score a line across cake horizontally to easily guide two-layer rose piping (one on top of another).
- Place parchment strips down on preferred cake stand and transfer cake on top.
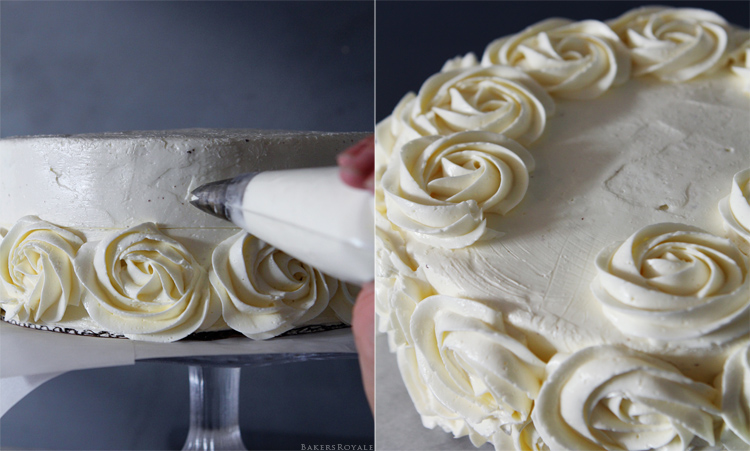
- Fill pastry bag fitted with a Wilton 1M tip and hold it perpendicular to the cake. To pipe rose, gently squeeze bag and move in a circular motion starting from the center and moving outward. Finish by releasing pressure and dropping the finishing point to the right of the starting point (to the left if you are left handed). Continue to pipe roses all the way around cake. For the second layer, start in between two roses and pipe all the around cake.
- For the top, start by piping roses along the perimeter and moving towards the center. Fill in empty spots with dollops of stars. To do so gently squeeze and lift pastry bag. I used this method to fill edges on the top and bottom of the cake
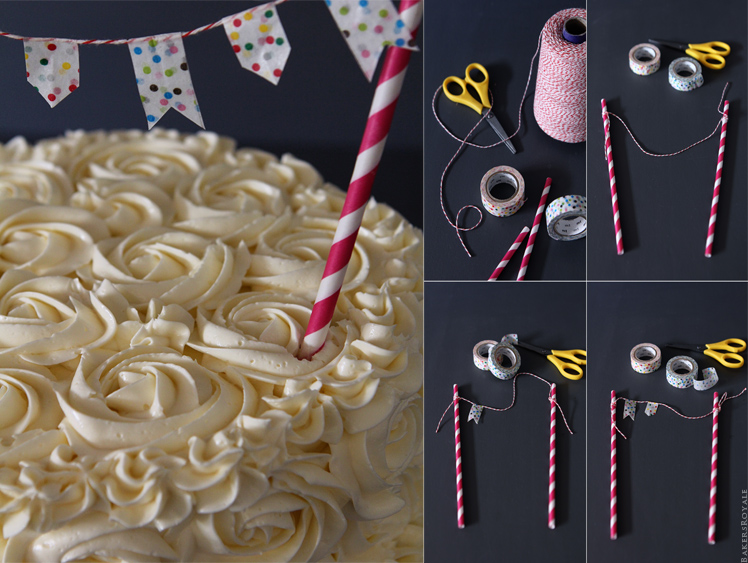
To make bunting:
- Supplies:(1) Twine (2) Two different patterned Washi tape (3) Striped straws and (4) Scissors
- Start by wrapping twine around one straw and extend and wrap twine to around second straw .
- Place first Washi tape around twine and cut a triangle pointing up toward top of twine.
- Place second Washi tape and cut a triangle pointing down away from the twine.
this cake is so pretty, and I love the washi tape banner!!
looks so pretty Naomi!
Whoa baby! Not only is this cake beautiful, but I had no idea how to make a rose cake. Life = complete.
Stunning Naomi!!
I still think it looks fantastic! The bunt makes it.
Naomi, I love your twist on Amanda’s rose cake…your star border around the top edge and at the base of the cake make it look finished off and frilly! Just lovely, girl. Thanks for sharing the tutorial. (Is there a missing link for the chocolate cake recipe?) Pinning!
Gorgeous frosting!
This cake is beautiful! I have to try my hand at this type of frosting detail. Love it.
I made a rose cake last year and posted a video as well. It’s definitely easier to do than it looks!
Naomi – this is just GORGEOUS!!! Your pictures always are just perfect too!!!
(Amanda’s cakes are just beautiful too!)
Stunning and I could never imagine creating something so beautiful. Pinned to my How To Make Board…I need all the inspiration I can get!
Gorgeous, the step by step photos are so helpful!
This is one gorgeous cake, Naomi! Love the step-by-step photos!
So talented! My skills are not this advanced. I need to practice 😛
Absolutely stunning!
This is such a gorgeous and delicious looking cake!
simply stunning. one of my goals to achieve this!!
Beautiful job, Naomi! One day I want to be able to make this gorgeous rose cake!!
It’s perfect! I have always wanted to make a cake look this, but never thought I could. I am still not sure, but I have tO give it a try! Thanks!! This is awesome!
You make it look easy! I can’t wait to try this technique!
So beautiful e delicate. Recently I’ve tryed to do this decoration, but i used chanilly instead (it´s a lighter cream, so the roses weren´t so pretty). Next time i’ll do your frosting sugestion… Maybe i’ll succeed.
Sílvia Martins
http://bocadinhosdeacucar.blogspot.pt/
I love rose cakes, their so pretty as it yours.
Ahhh this is so pretty! I’m definitely going to attempt this when I have all the tools and a special occasion to present it for.
This is awesome!! I’ve been so intimidated to do this but, I’m going to try!! Thanks Naomi! So beautiful.
I’ve been wanting to try the rose cake for a while. It seems so intimidating! I need to get over it and give it a try. Beautiful cake!
Looks sooo tasty! I thought it was a standard buttercream frosting, but it’s meringue, ah… I suppose you need a special candy thermometer for that, too.
Looks gorgeous!!
Such a beautiful cake!! Would be lovely at showers & birthdays 🙂
This is beautiful! Thank you so much for sharing this! Feel free to visit my recipe site http://www.BetterOffHealthy.com.
I admire your patience in making this… I will gladly eat it for you.
I SOOO badly want to make a rose cake, it does look so easy to do but so gorgeous!! Still nervous but need to get over it and make one!!
Its simply awesome.
Great share. Speechless.
Good morning.
Since early September I began to take a tour of all network blogs that suggests me something. It’s my personal way to show all I like. I have linked your blog in my latest publication. Everything is properly referenced. Congratulations for your work. Thank you very much.
http://lascosasdecosima.blogspot.com.es/2013/09/30-septiembre-2013-me-acompanas-por-la.html
It’s so pretty! I have a feeling mine would look far, far less nice though, haha.
itz osum
i guess i hve to try wid ma hands
love ittt
it would surely look tasty nd beautiful wen i mke it!!!!!
I tried the frosting and it was great but I accidentally added the butter before thickening the egg whites and afterwords it still wasn’t getting thick so I popped it into the freezer hopefully it gets better but do u have a soulution to my problem?
Would be great if this post included a picture of the actual tip you used on the pastry bag. I have about 40 tips of various makes and models, but don’t see a “1M” tip. I have no clue which one you are using. Can we see the tip itself? Thanks.
This time while decorating my cake. I will gonna give this decoration a try. Hoping not to mess.
Thanks for sharing your recipe to make a rose cake. Delicious cake.
Regards
Chef Bakers
Thanks for sharing the tips for making such beautiful roses on cakes. Would definitely try and again comment over here. Please keep us updated with such cake decorating tips.
Thanks a lot for this blog. You mentioned all the points very clearly. This will helps me a lot.
You make it look easy! I’m going to give it a try :))))
CakeNBake offers adult cake for a bachelorette party in Delhi, Noida, Gurgaon. Buy funny cakes for the bride and groom at the lowest price. Free delivery
For wonderful, flavorful cakes place your order online on Ambala Cakes chocolate cake
Order online cake in Delhi NCR, the best cake shop offering cake at an affordable price with free home delivery. 100% fresh and eggless cakes.
Wow! It’s look so yummy. Your cake’s flower design is so awesome. I must try this item in my home.
Your blog has piqued a lot of real interest. I can see why since you have done such a good job of making it interesting. I appreciate your efforts very much.
This rose cake recipe looks absolutely stunning! I can’t wait to try it out and see if I can recreate the beautiful rose design. Thank you for sharing!
Thanks for sharing world’s best roese cake recipe. I have made this and enjoyed a lot with my family.
Tried it. It tastes amazing but I don’t have your hand with the frosting. Anyhow, the taste is simply divine
I’m not an experienced baker, but thanks to this tutorial, I was able to make beautiful roses on my cake that looked like they were done by a professional. Highly recommend it!
Gorgeous, the step by step photos are so helpful!
Gorgeous, the step by step photos are so helpful!
I’m not an experienced baker, but thanks to this tutorial, I was able to make beautiful roses on my cake that looked like they were done by a professional. Highly recommend it!
“My experience with Pacatus Certification Pvt Ltd in obtaining>a href=”https://www.pacacert.com/iso-certification-in-ras-ai-khaimah/ “>ISO certification for my business in Ras Al Khaimah was exceptional. From the start, their team demonstrated professionalism and deep knowledge of the certification process. They guided us through each step, ensuring compliance with international standards. Thanks to Pacatus, our business now stands out with ISO certification, and we’ve seen improvements in quality and efficiency.
“I am extremely satisfied with the services provided by Pacatus Certification Pvt Ltd in helping my business in Umm Al-Quwain achieve ISO certification. Their team displayed exceptional professionalism and knowledge throughout the certification process. They guided us meticulously, ensuring that we met all international standards.
Food safety system is absolutely crucial in the gift & birthday cake making business. These special occasion cakes are often a focal point of celebration, and ensuring their safety is paramount for several reasons. Firstly, these cakes are meant to be enjoyed by people of all ages, including children, pregnant woman and the elderly, who may be more vulnerable to food borne illnesses. Contaminated cakes can lead to severe health consequences, which is the last thing anyone wants on a special day.
Secondly, gift and birthday cakes often incorporate a variety of ingredients, including dairy, eggs, and fresh fruits, which can be prone to bacterial growth if not handled and stored correctly. Proper food safety measures are essential to prevent contamination and ensure that these ingredients are safe to consume.
A commitment to food safety not only safeguards customer health but also helps businesses thrive by establishing a positive and reliable image in the market.
these is a good article about the how to make a rose cake also if you know about burger n all chick fil a full menu you can visit here
Great article for how to make best rose cake. Love to read.
This is great article – love from bdaykart.com
Hi,
I’m not an experienced baker, but thanks to this tutorial, I was able to make beautiful roses on my cake that looked like they were done by a professional.
Thanks…
I loved reading this, I am excited to make this at home.
The European standard BS EN 378-1 outlines the safety and environmental standards for heat pumps and refrigeration systems.
Beautiful, the detailed images make the process so clear!
nice rose cake
Creating beautiful icing roses can be a fun and rewarding experience! This step-by-step tutorial makes it easy to achieve stunning results. Don’t be discouraged if your first attempts aren’t perfect—practice makes perfect! Consider starting with rose cupcakes for a smaller canvas to hone your skills.
Really amazing way to explain
This is a very good tip especially to those new to the blogosphere.
Brief but very accurate information… Thank
you for sharing this one. A must read post!